9 Easy & Fun DIY Projects You Can Do With Your Kids Using Things You Already Have At Home
Let them have fun by unleashing their creativity!
Published for Ribena, 10 Apr 2020, 09:00 AM
1. Invisible Ink
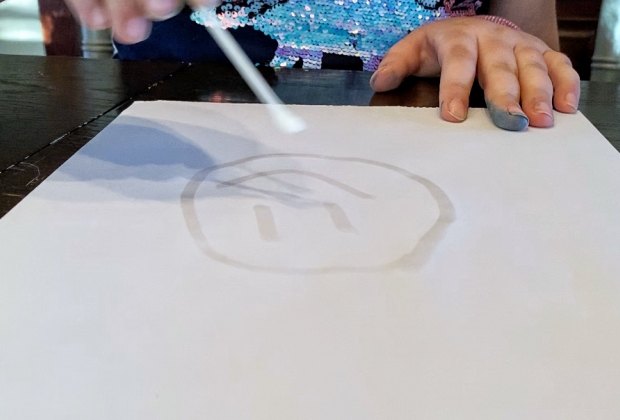
Materials: A piece of paper, a cotton swab, a heat source (lamp, electric stove, hairdryer, etc.), and some milk or lemon juice
1. Dip the cotton swab into the milk or lemon juice, and let your kids use it to write or draw a super secret message on a piece of paper.
2. Let the message dry completely.
3. Once it's dry, help your kid reveal the secret message by holding up the paper to a heat source such as a lamp, electric stove, or a hairdryer.
4. As the milk or lemon juice 'ink' heats up, it will oxidize and turn brown, revealing the message!
Sourced via Mommy Poppins
2. Five-Minute Ice Cream
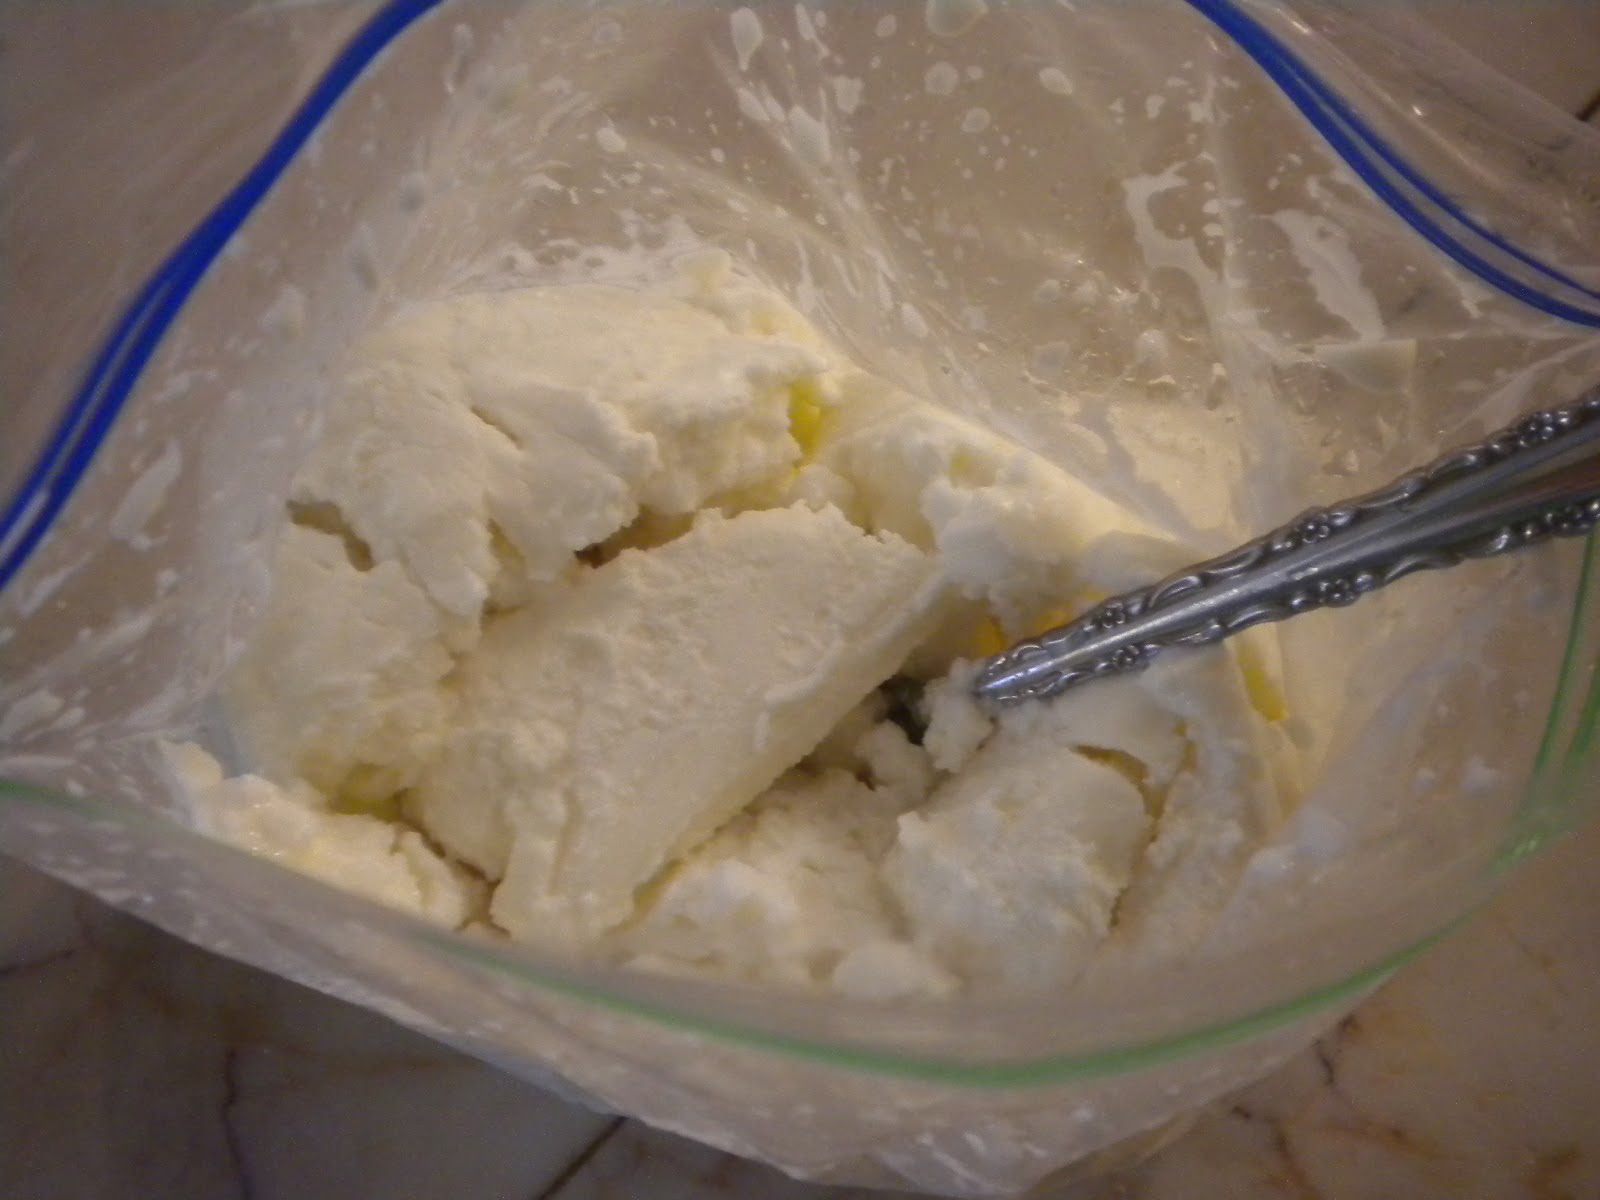
Ingredients: 1 tablespoon sugar, 1/2 cup milk or heavy cream, 1/4 teaspoon vanilla extract or other flavourings, 6 tablespoons salt, ice, and both large and small sized ziploc bags
1. Fill up the large ziploc bag halfway with ice. Add six tablespoons of salt, mix, and set aside.
2. In a bowl, mix together the sugar, milk/cream, and vanilla extract. Pour this mixture into the small ziploc bag and seal it tightly.
3. Put the small bag into the large bag. Make sure it's completely buried under the ice. Seal the large bag shut.
4. Shake the bags vigorously for five minutes. You might want to use a towel to hold them, since they will be very cold and slippery from condensation.
5. Open up the bags, grab a spoon, and dig in to some yummy homemade ice cream! Feel free to experiment with flavours and of course you can add whatever toppings you and your kids like.
Sourced via How Stuff Works
3. Mess-Free, Three-Ingredient DIY Glitter Slime
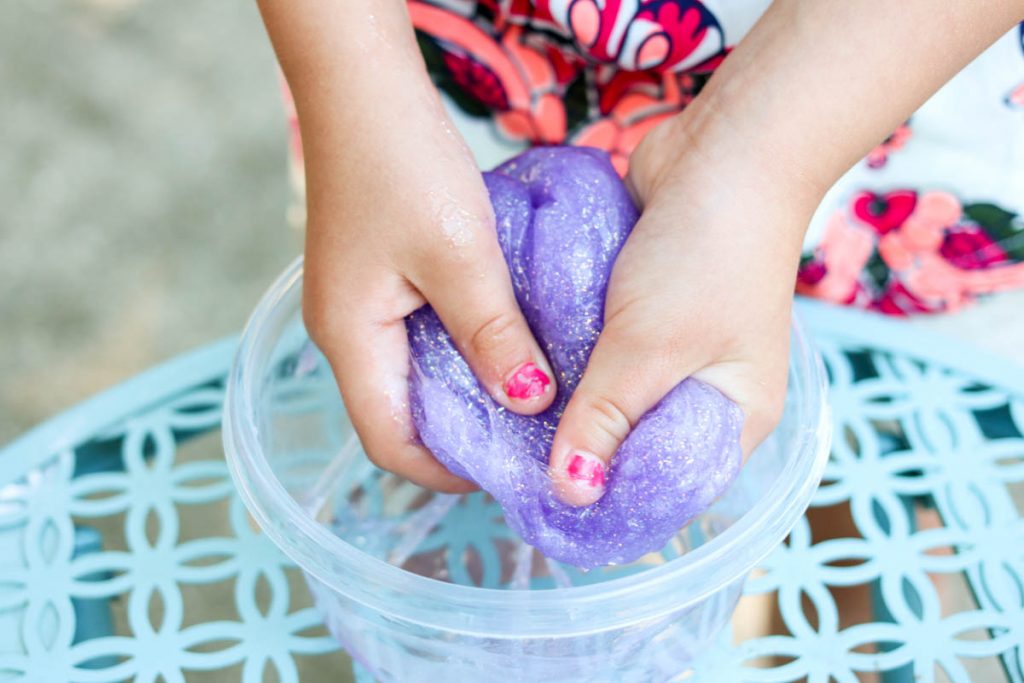
Materials: Baking soda, contact lens solution, and glitter glue
1. Pour about 6oz of glitter glue into a bowl.
2. Add half a tablespoon of baking soda and stir.
3. Add one tablespoon of contact lens solution to the mixture.
4. Mix until slime begins to form and gets firm.
5. When it starts becoming difficult to stir with a spoon, take the slime out of the bowl and knead with your hands to finish combining the ingredients.
6. If the slime is too sticky, add an extra quarter tablespoon of contact lens solution and incorporate well.
Sourced via Kinder Craze
4. Vegetable Stamps

Materials: Leftover veggies, paint, and paper
1. This is a great way to use up leftover veggies and inedible parts. Just chop off the tops or edible parts, and give the rest to your kids.
2. Apply paint onto the cross-section of the veggies, and stamp them onto paper to create fun designs, it's that simple! Veggies like bok choy ends, bell peppers, and bendi work great for this, because they result in cool shapes.
3. If you want, you could even create customised stamps by carving shapes into veggies with a flat cross-section, such as potatoes and carrots.
Sourced via Sheila Shahzreen
5. Easy Peasy Peanut Butter Cookies
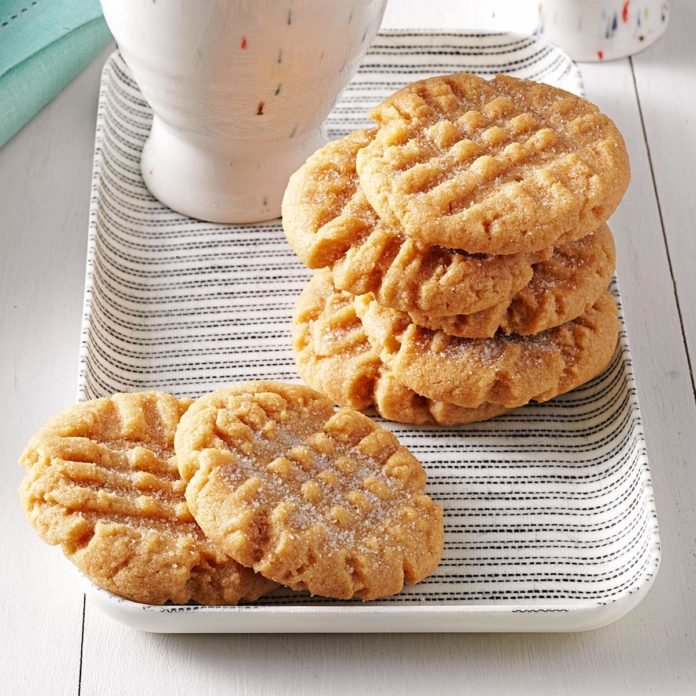
Ingredients: 1 large egg (room temperature, beaten), 1 cup sugar, and 1 cup peanut butter
1. Mix all the ingredients in a large bowl.
2. Scoop up level tablespoonfuls of the batter and roll it into balls.
3. Place on an ungreased baking sheet and flatten with a fork.
4. Bake at 180°C until set, which should take about 18 minutes.
5. Remove the baked cookies from the tray and place on a wire rack to cool.
6. Enjoy your scrumptious cookies!
Sourced via Taste of Home
6. Microwave Puffy Paint

Materials: Flour, baking powder, salt, food colouring, ziploc bags, and paper
1. In a big bowl, mix a cup of flour, three teaspoons of baking powder, and a teaspoon of salt. Add enough water and stir until you get the consistency of pancake batter.
2. Separate the mixture into ziploc bags and add drops of food colouring. Seal the bags and squish until the colours are fully incorporated. One colour per bag.
3. Tie up the ziploc bags to form piping bags, and snip off the tips.
4. Let your kids unleash their creativity and pipe out all kinds of designs onto paper.
5. Pop the painting into the microwave for 30-45 seconds at 200 degree centigrade. Watch the paint puff up and grow as it 'bakes'!
Sourced via Mommy Labs
7. Rainsticks
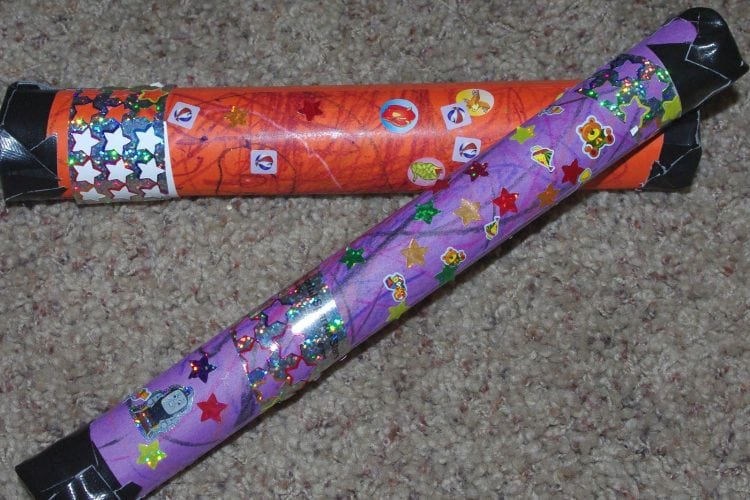
Materials: Cardboard tube, aluminium foil, rice/seeds, tape, and anything you want to use as decoration
1. Let your kids decorate their cardboard tubes with anything they want - paint, markers, crayons, stickers, glitter, colourful paper, it's up to them!
2. Tape up one end of the tube to create a cap.
3. Loosely crumple up a piece of aluminum foil that is slightly shorter than your tube, and insert it into the middle.
4. Pour in about half a cup of rice, seeds, etc. and seal the other end shut.
5. Turn it from side to side to listen to the sound of falling rain!
Sourced via Happiness is Homemade
8. Growing Celery & Other Veggies
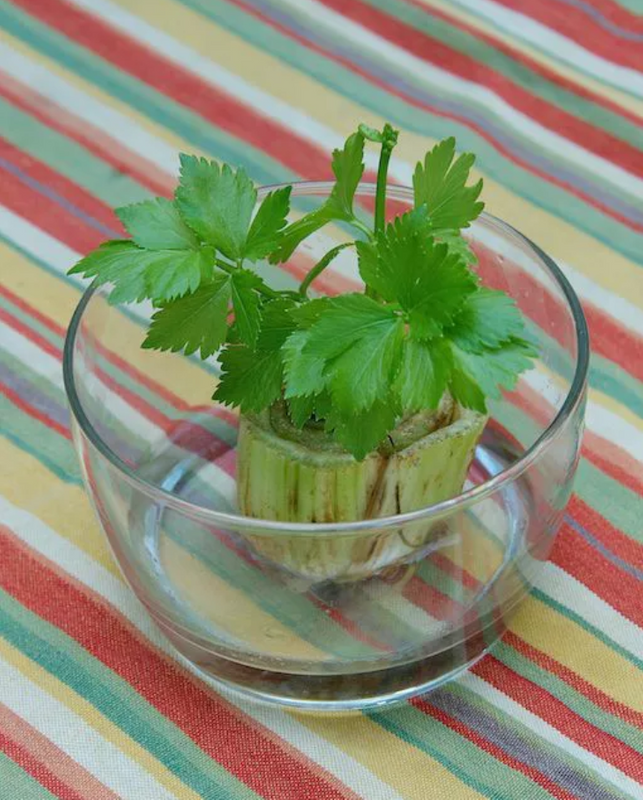
Materials: Celery, water, and a glass
1. After you've used the rest of the celery, save the celery bottom and place it in a glass with some water in it.
2. Get your kids to keep an eye on it and check it every day. They should see some growth in just a few days.
3. Once it roots, you can plant the celery bottom in a container or in your garden, and voila, you'll have your very own celery stalks and leaves, which are great for cooking.
Kickstart your own edible garden with the kids by growing onions, garlic, potatoes, carrots, and more.
Sourced via The Spruce
9. Rainbow Wizard's Brew
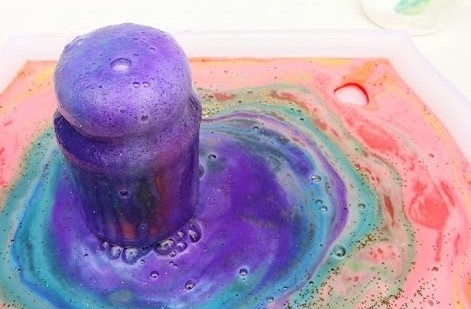
Materials: Baking soda, liquid watercolours or food colouring, glitter, dish soap, vinegar, glass jar, small plastic containers, and a tray
1. Fill up the jar halfway with vinegar, then add a few drops of one colour of liquid watercolour or food colouring as well as some glitter and dish soap. Stir.
2. Place the jar on a tray and get your kid to add in a heaping teaspoon of baking soda.
3. Stir again and watch the foaming begin. The more you stir the mixture, the faster and crazier the reaction!
4. Keep adding baking soda and vinegar when the foam starts to slow.
5. To make it change colours, add a tablespoon of vinegar mixed with one colour of liquid watercolour/food colouring every so often. Make sure to add it into the centre of the brew.
Sourced via Babble Dabble Do
While we all stay at home throughout this Movement Control Order (MCO) period, it's important to keep our spirits up, especially if the little ones are starting to feel restless from being at home all the time
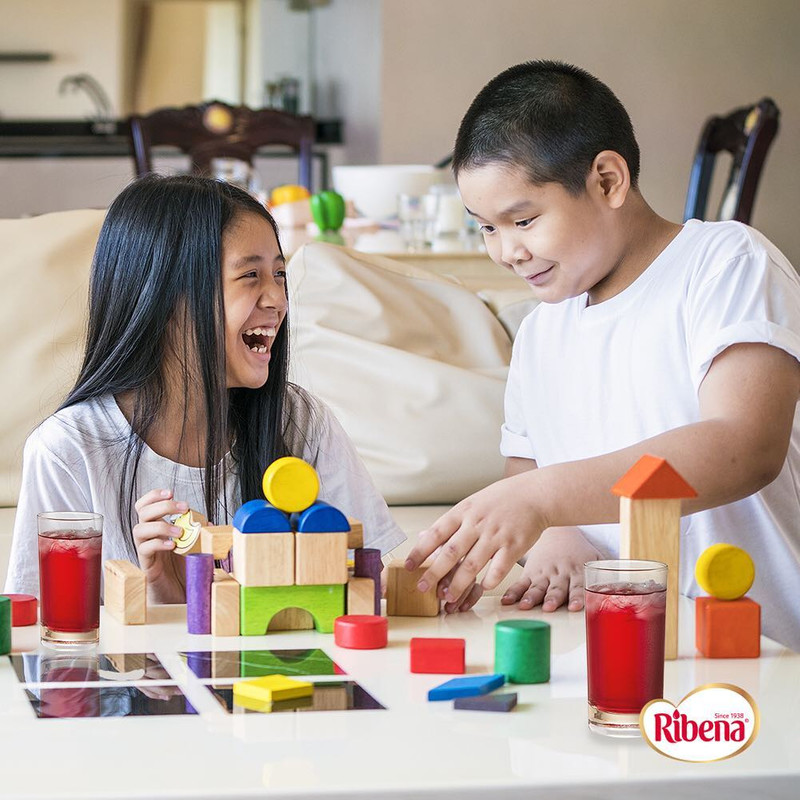
Creating fun and joyful moments at home is a great way to keep the kiddos in a good mood. Besides doing easy DIY projects together, other ways to keep them occupied at home include playing their favourite games, online learning, watching shows, cooking and baking, getting them to do simple chores, and so much more.
You could even give them a special treat every once in a while, like baking up some cookies, or even just a refreshing glass of Ribena
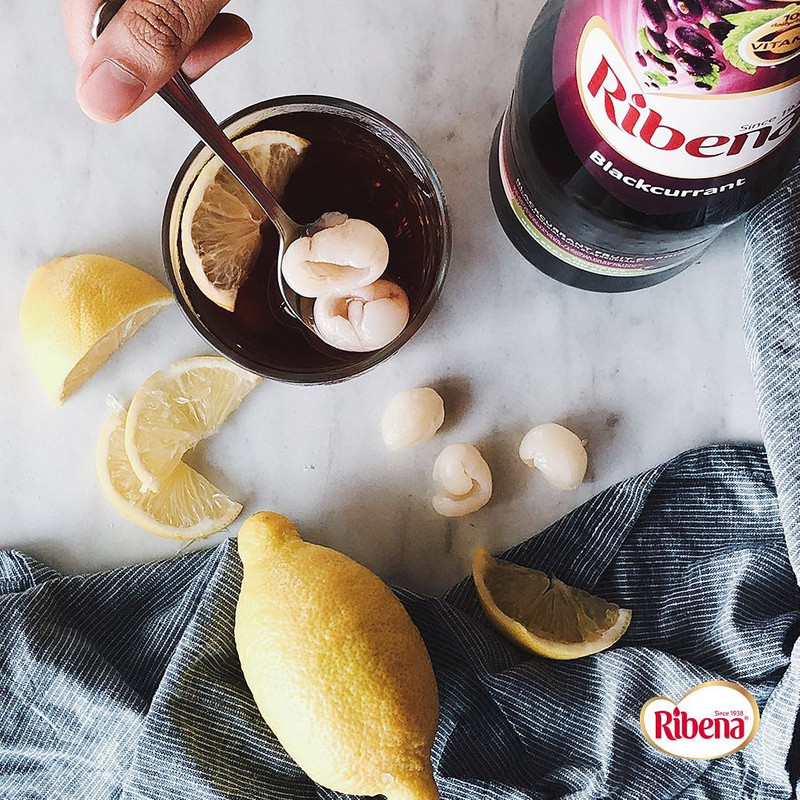
Filled with lots of Vitamin C goodness, a nice, cold glass of Ribena is the perfect thing to cool down your little ones and keep them happy while they're home all day.
Whether they're enjoying it with extra ingredients added or just on its own, gulping down some Ribena is sure to give your kids a burst of joy! Plus, it's loaded with #ribenagoodnessvitaminC.
Ribena would also like to remind everyone to stay home and stay safe.
